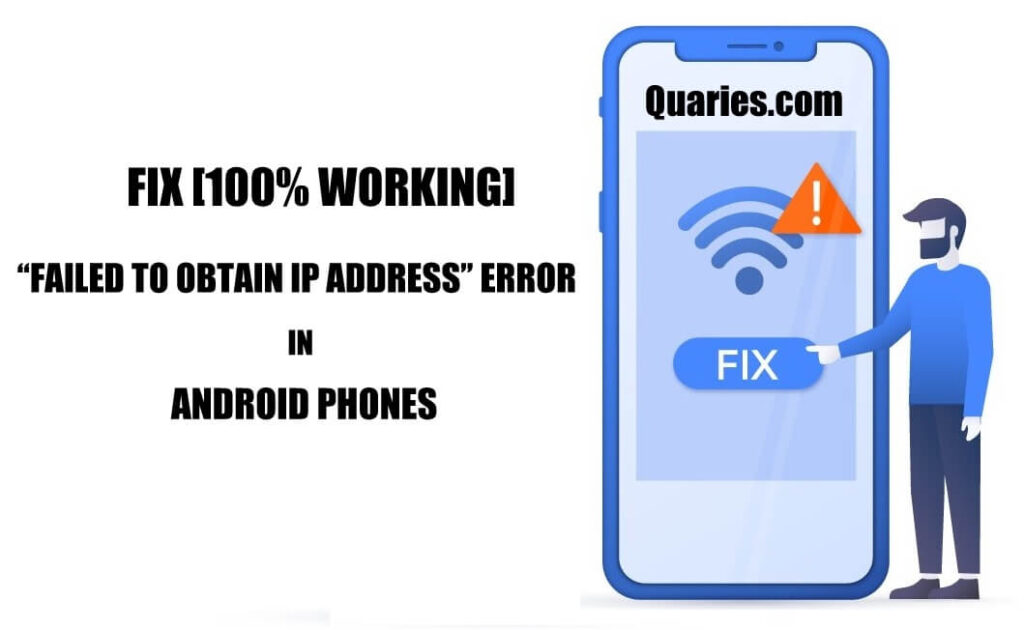
Android phones sometimes give us annoying errors, one among them is the “Failed to obtain IP Address” error that is displayed while you are trying to connect to any WIFI network, this happens suddenly and you won’t be able to connect to any WIFI network when you face this error. Sometimes it occurs because of errors in your ISP provider too but if other devices are able to connect to the same network and you can’t then you need a fix. In this article, we will explain to you why this error occurs and how you can fix failed to obtain IP address error within a few seconds, read the complete article to get complete information.
Why do I get Failed To Obtain IP Address Error?
When you connect a device to WIFI connection, the router assigns an IP address to your device and appearing of this error means that the router is not able to assign you an IP address, this same error can also sometimes show up differently, some users just get the wifi connection progress stuck at “Obtaining IP Address” until the connection request times out. following are some of the most common reasons why this error might occur to you.
- Incorrect Password: Incorrect Wifi password is one of the most common causes of this error in Android phones, so before worrying, make sure that you have entered the correct password without caps lock.
- VPN Connection Failed: If you are using any VPN to maintain your privacy on your Android phone, then it can cause the error in some cases when the VPN app is not able to connect to its proxy server, So make sure you switch off any VPN connection before trying to solve this issue.
- Poor Connection: If the Wifi network signal is not good, this error can occur. Try moving closer towards your Wifi router and reconnecting.
- MAC Filtering: Some routers have privacy settings to connect with only whitelisted MAC Numbers. If you are wondering what a MAC number is, it’s a unique number assigned to all the computers.
- Fault in your Router: Hardware damage in your Wifi router can cause malfunction and cause these errors if its the case then you will have to get your router repaired or get a new one (first try all the solutions given here).
These are some of the most common reasons why your router is not able to assign an IP address for your Android device, now it’s time to fix it. We have listed all the possible ways to fix the Failed to Obtain IP Address error quickly.
How to Fix Failed to Obtain IP Address Error?
We have Provided all the working Solutions to the issue of “Failed to Obtain IP Address” or your wifi connection process is stuck at “Obtaining IP Address” below. But before trying these solutions make sure that you don’t have any VPN app active and have entered the correct password to your Wifi connection.
Solution 1 – Use Static IP Address [Most Working Method]
This is the best method to solve your error, just assign a static IP Address by yourself and try connecting again to fix failed to obtain IP Address issue, follow the steps given below to assign a static IP Address in your Android phone.
Step 1: Open your Android settings and navigate to “Wifi” settings.
Step 2: Long Press on the Wifi network you are trying to connect and click on “Modify Network”. (In Some Android devices, you have to click on the “i ” button next to the network you want to connect to).
Step 3: Click on “Advanced options” to show the IP Settings option.
Step 4: In “IP settings” option select “Static“.
Step 5: In the IP Address section, just enter the default IP Address with just the last digits changed to anything between 0 to 225 (Example – 192.168.1.200).
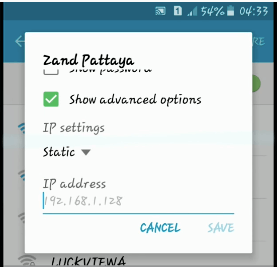
Step 6: Save the settings and try connecting to the Wifi network again, it should be connecting successfully now.
We hope that this solved your error, but if its still not fixed for you don’t loose hope, try the other solutions given below to solve your issue.
Solution 2: Turn OFF MAC Filtering
If only you are not able to login into your WIFI Network and all others are able to use the internet through the same WIFI network, then there is a high probability of MAC Filtering being enabled in your Router settings, check it and turn it off if its enabled to solve this problem. Follow the Steps below to turn off MAC Filtering in your Router (Please note that different routers have a different name to the settings, the following steps are the standard steps to follow all routers have a similar procedure to turn of MAC Filter.
Step 1: Connect your Router using a LAN cable to your computer, or if you don’t have a computer you can use any device that is presently connected to the Wifi Connection to perform next steps.
Step 2: In the backside of your Wifi router, you will find an IP Address and User credentials, those are your router login details.
Step 3: Enter the given IP Address in a web browser and enter the credentials given in the backside of your router to login into your Router settings.
Step 4: Once you are logged in you will find “MAC Filtering” Option in the dashboard, click on it.
Step 5: In the MAC filtering settings, make sure to disable the MAC Filtering and save the settings.
Now, restart your router and try connecting your Android phone to the WIFI network again and check if everything is working properly. these two are the most working solutions to the “Failed to obtain IP Address” Error in Android, if your problem is still not fixed follow the solutions listed below, these are reported to solve the error for some Android users.
Solution 3: Some Other Workarounds
90% of users who get the failed to obtain IP Address error get them solved with the above listed 2 solutions, if this has not solved the problem for you try out these things, it can solve your problem.
- Router reboot: Switch off your Wifi router and disconnect all the cables attached to it, clean all the ports with a blower or simply by blowing air from your mouth to clean the dust. After cleaning reconnect all the cables and check if the error is solved after switching on.
- Airplane mode: Sometimes the connection error is caused by your Android device and it can be solved simply by turning on and off the Airplane mode in your phone, this will refresh all your Android phone’s network drivers and solves the issue.
- Forget Network: If you are trying to connect to an already saved Wifi network, try forgetting the network and starting a new fresh connection. To Forget the network, long press on the Wifi network you want to connect and click on “Forget Network” button.
- Rename your Android Device: Renaming your Android device solves the error for some users, to do so go your Android settings and navigate to “About Phone” And tap on “Device name” option to rename your phone.
Conclusion
we have listed all the possible working Solutions to “Failed to obtain IP Address” error in Android phones in this article, we hope that the error is solved for you, don’t forget to comment down which of the solution worked for you in the comments section below. Keep visiting Quaries regularly to get the latest technology updates and solutions to common errors in different devices.