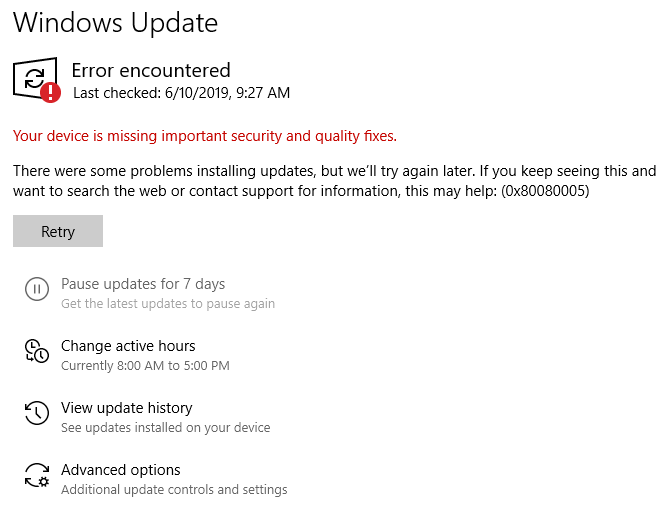
Well, if you have ever tried updating your Windows OS just to find the above mentioned 0x80080005 error flashing up on your screen. Then trust me you are not alone facing such an issue.
Nearly every Windows user in their lifetime at some point has definitely come across this particular error or something similar to it while updating their Windows OS.
But, then again like every other error, incase of the 0x80080005 error too, just simply following a set of fixes and methods should do the trick to get rid of this annoying update issue once and for all.
In the following article I will try to sum up all there is to know about the update error, from its causes to the various fixes you can try in order to get rid of the problem once and for all.
Causes of the 0x80080005 Windows Update Error
It is always a good idea to first have a little idea about what could be causing such an error to occur before actually dealing with it. This way not only do you have an idea of what to expect, but be better prepared next time for such an error which may occur again in the future.
Let us hene have a look at all the possible causes or reasons which may be responsible for such an error or similar errors to occur:
Cause 1: Certain Antivirus functions may block an update
Although very rare, there may be occasions when your Antivirus software may be the one responsible for blocking updates resulting in such an error to occur.
At times certain updates and patch fixes done for the Antivirus software itself might result in blocking some Windows functions and features. Due to this reason, there is always a possibility that if an error as such occurs after a recent Antivirus software update, then the problem probably lies within the Antivirus itself.
Cause 2: Windows Update components may be corrupted and not working properly
At times, running a Windows update might result in such errors to pop up when during the time of update certain files or services in the system which are needed during the process of update are not found or damaged.
These files are mainly present in your PC storage itself and if in the past due to some reason or external factors these services or files are affected, then this may as a result stop the update from going through smoothly.
Cause 3: Corrupted System Files
Quite similar to what we had seen earlier in the case of Update components, for System files too if there are any files or folders which were damaged or corrupted in the past or present, it would then result in the failure of Windows Update process.
Cause 4: Windows Update Service may not be working properly
Cases where the Update Service itself might be at fault, although very rare, cannot be disregarded and taken out of the picture completely. There is always a chance that either due to something which might have gone wrong during the previous system update, the current one might face issues. In such cases you either try to update your system manually or use the Media Creation tool to fix the error as shown below.
How to fix “update error 0x8008005 on Windows 10”?
Now that you have seen and understood some of the key causes responsible for such an error to occur in the first place. Let us next have a look at all the possible solutions and fixes you can use to fix the particular update error in your respective Windows systems.
Method 1: Disable Windows Firewall or Third party Antivirus software
If somehow after a recent antivirus update, you are having trouble updating your Windows OS, then probably the fault lies somewhere with your Antivirus software itself.
Now, here if you have a third party Antivirus software installed in your Windows system, then you might try disabling it once completely and try to launch the update once again.
OR
If you have the pre-default Windows Defender system running on your system, then to do the same you can follow the steps as shown below:
- The very first thing you need to do is head to the Windows Search bar, type in Windows Security and when the app shows up click and open it.
- Once the Windows Security Home page opens up, on the left pane click and select on Virus & threat protection.
- Then on the Right pane window under Virus & threat protection settings click on the Manage Settings option.
- Now, turn off the Real-time protection option and then try launching the Windows Update to see whether the error still persists.
Now, the above process is more or less the same for other third party antivirus application softwares as well. In all cases, you either have to disable the anti-virus app or simply uninstall it all together and see whether the error still remains or not.
Method 2: Troubleshoot with Windows Update Troubleshooter
This is a pretty conventional way of solving almost all problems or errors out there which may be related to Windows systems. If you have the right files on your system, then simply troubleshooting does most of the tricks.
Let us have a look at how we can use Windows Update Troubleshooter to fix the particular 0x8008005 Update error on Windows 10 systems:
- Similar to what we had done earlier, first head to the Windows search bar, type in Settings and then click on and open the Settings app.
- Then in the Settings window, scroll down and click on the Update & Security option.
- Now from the left pane menu list, select on the Troubleshoot option and then click on the Run the troubleshooter button under Windows Update option on the right pane.
- After this, simply go through the prompted messages to finish the troubleshooting process completely.
- Once the Windows update troubleshooting is successfully completed. Next, try running the Windows update service once again to see whether the error still exists.
Method 3: Scan system using CMD
Another great way of fixing issues which may show up on Windows systems quite often, is with the help of command prompt. Since, command prompt takes care of things manually at root level, the changes are quite permanent and easy to implement.
Let us have a look at some of the CMD fixes, you could try out in order to fix the particular update error on your respective systems:
Using SFC scan
- To run an SFC scan, you will first need to head to the Windows search bar, type in CMD and right click on the Command Prompt app.
- Then from the drop down menu list, click and select on Run as administrator.
- Once the command prompt window opens up. Next, write the command sfc/scannow and hit Enter.
- Let the scanning process finish and then after completion, try running Windows update once to see whether the error is still present.
Using DISM Scan
- For this method, you will first need to press on Windows key + X.
- Then from the list of menu options, click on and select Windows Powershell (Admin) option.
- Next, in the PowerShell command window type in the following command: DISM /Online /Cleanup-Image /RestoreHealth and hit Enter.
- The entire cleanup process may take a few minutes and hence it is advised that you wait patiently for the process to complete on its own without any kind of interference.
- Lastly, after the process is successfully completed, try running the Windows update service and see whether the error still pops up.
Using CHKDSK scan
- Once again for this method too, press on Windows Key + X and then select the Windows PowerShell (Admin) option from the menu list.
- Then in the command line, type in the following code: chkdsk /f c and hit on Enter.
- Next, let the process take place on its own and try to not interfere while the process is taking place. Once completed, try running Windows update to check whether the error is still there or not.
Now all the above mentioned CMD fixes can be used interchangeably with one another in a trial and error fashion to get the most out of it. At times one step may have to be repeated to find the optimal solution that works best for you.
Method 4: Enabling ownership of System Volume Information Directory
At times, just because Windows might not be able to access certain files on its own, such errors may occur.
All you need to do here is change the system permission and enable full access so Windows can carry on with changes such as running an update on its own.
To enable ownership, all you need to do is follow some simple steps as shown below:
- Firstly, press on the Windows Key + X as you had done earlier and then select the Windows PowerShell (Admin) option from the menu list.
- Next in the command line, type in the following commands: cmd.exe /c takeown /f “C:System Volume Information*” /R /D Y && icacls “C:System Volume Information*” /grant:R SYSTEM:F /T /C /L and then press Enter.
- Once you are done with that, try running Windows Update once again and check whether the error still occurs.
Method 5: Disabling Windows Update Service
This step is pretty much like switching off and on a device at times when a device stops working properly. With Windows Update Service too, most often simply disabling and enabling the service itself helps resolve the issue completely on its own.
To Disable and Enable Windows Update Service, you can follow the instructions as listed below:
- Go to your Windows Search Bar, type in Run and then click and open the Run app.
- Then, inside the Run window text box, type in services.msc and hit the OK button.
- Now, from the Services window, over at the right pane window, scroll down and select Windows Update.
- Next, go to the General tab in the Windows Update Properties window and under Startup type set the option to Disabled.
- Then click on the OK button to save the changes you have recently made.
- Now, restart your PC and then change back the settings by going to the same Windows Update Properties option and changing the Startup Type back to Automatic from Diabled.
- At last, hit the OK button to save the changes and then try running the Update service.
Method 6: Using Registry Editor
Here, although the term Registry may sound quite complicated to many, there is absolutely nothing to worry about. All the steps are pretty straight forward and will not give you any trouble as long as you follow them as shown here below:
- Go to the search bar, type in Run and click to open the Run app.
- Next inside the Run window box text box, type in regedit and hit on the OK button.
- Then, on the left hand pane of the Registry Editor window scroll down and click on the HKEY_LOCAL_MACHINE folder.
- Then from the drop down menu browse through the following folders: SYSTEM\CurrentControlSet\Control.
- Next, over at the right pane window, right click on any empty space. Then click on New and select the DWORD (32-bit) Value, after which name the file as RegistrySizeLimit.
- Select and open the recently created RegistrySizeLimit DWORD.
- Then under the Value Data text box type in: 4294967295 and hit on the OK button. After this try restarting your system and then running the Windows Update service.
Method 7: Resetting your Windows Update components
This method has proved quite useful for most users out there who have faced similar issues in the past with their respective systems. Hence, this is one method which you should definitely try out.
And although it is quite a lengthy process, how many like to put it, there is absolutely no hassle at all as long as you follow the steps and type in the following commands as shown below:
- Firstly, open up the Command Prompt by Running it as Administrator.
- Next, type in the following command and hit enter after each line as shown in the picture below:

- The process should automatically take place and should be completed in a few minutes, after which you can try launching the Windows Update service once again.
Method 8: Use Media Creation Tool to Upgrade Windows
Finally, one of the most effective fixes which I personally found quite handy is using the Media Creation Tool to upgrade Windows altogether in order to fix the particular update issue along with other such issues which may be present.
To use the Media Creation Tool to fix the update error, follow the instructions as listed below:
- Firstly, you will need to download the Media Creation Tool, which you can simply do by clicking on the following LINK.
- Once the tool has been successfully downloaded. Next, run the tool and check mark the Upgrade this PC now option and then hit on the Next button.
- Let it download all the files onto your PC and then once all the required files are successfully downloaded, click and go through the prompted instructions.
- At the end, you will be asked what you would want to keep. Select the ‘Keep Personal files and apps’ or even nothing depending upon your needs. And then click on Next.
- The installation will automatically take place. Give it some time to finish off the process, after which try launching the Windows Update service once again.
In this way applying one method along with the other in combination with each other you should be able to fix the issue quite easily.
Like This Post? Checkout More