If you are trying to Wipe your cache partition on your Android Smartphone, then in this post, I am going to tell you how to wipe your cache partition on an Android phone. And for more Smart Device guide please visit here.
What Is the System Cache partition?
If you don’t know, then the system cache partition is where temporary system files are stored, and you can find this under the /cache directory. Also, the system cache partition stays separate from individual app caches, and is inaccessible without rooting your phone.
What kind of data is stored in the system cache partition?
Mainly system updates are stored in the system cache partition.
How Wiping your cache partition helps Your Android Phone?
By wiping cache partition, you can remove any temporary files that will be causing any issue with your device. Also performing a “wipe cache partition” doesn’t interfere with your personal files and settings, they stay unaffected.
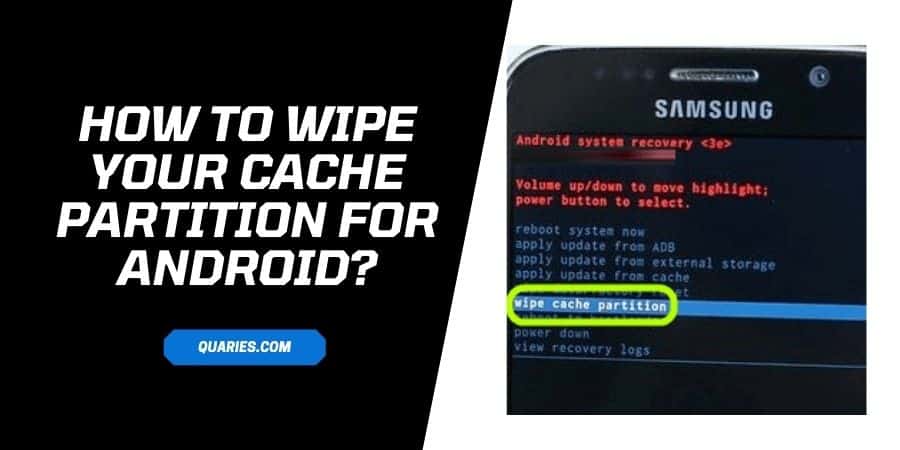
How to wipe your cache partition For Android?
- Switch off your Android device
- Simultaneously press and hold the Volume Down + Power buttons, (Or if your phone has any other button combination to boot into Recovery Mode, then use those combination).
- Release the keys as you see the Recovery mode option on the screen.
- Go to the Wipe Cache Partition by using the volume button, and select it by tapping the power button.
- Now, wait till the system cache partition clear.
- Once the system cache partition clear, go to the Reboot option and tap on it.
- Once the Reboot process finishes, you are done.
How to wipe your cache partition For HTC PHone?
- First, switch off your phone
- Press and hold the Volume Down button until you see the Bootloader screen.
- Use the Volume button to navigate and go to Recovery.
- After reaching the Recover option, press the power button to select.
- After this, your phone will appear to reboot, and your phone screen will reappear after 15-30 seconds.
- Wait till you see the recovery screen on your phone
- After that, hold the volume up button and then press and release the POWER button.
- Go to wipe cache partition by using the volume button.
- Then after reaching the wipe cache partition option, press the power button to select.
- Wait till your phone wipes the cache partition
- Then go to the reboot system, and tap the power button to select.
- Once the reboot finishes, you are done.
Wipe Cache Partition On Samsung Galaxy Note 10.1
- First, turn off your phone.
- Press and hold the Volume Up and Home button
- While continuing to hold the Home and Volume Up buttons, press and hold the Power button until you see the “Recovery Booting” screen.
- Once you see the “Recovery Booting” screen, release all buttons.
- Use the volume button to navigate, and choose the wipe cache partition.
- Wait till your system clears the cache partition.
- Then go and select the reboot system.
- Once the reboot process finishes, you are done.
Like This Post? Checkout More